Tips & Tricks
We strived to make the interface for Linea intuitive, but underneath that simple exterior are some hidden gems. The following tips & tricks will help you get the most out of your sketching. Some tips only apply to or .
Drawing Tools
Larger Tool Sizes – Some tools like the Art Pencil, Pen, and Marker have multiple sizes. Open the tool's options and flick left and right (or tap the paging arrows) on the size settings to access larger nib sizes.
Perfect Flood Fill – Linea's fill tool makes it easy to color enclosed areas of a sketch simply by tapping. For the best results, don't fill the shape itself. Instead, select and fill the layer beneath the shape. This will result in a clean fill with minimal pixel fringing at the edges. It also lets you to erase or edit the filled area without affecting the outline itself.
Get a Tiny Eraser – The size of the eraser scales in proportion to the level of zoom on your drawing. The further you zoom in, the smaller the eraser will become, allowing you to erase small detailed sections.
Erase with ZipLine – ZipLine works with all drawing tools, including the eraser. It can quickly erase rough edges and clean up shapes or textured backgrounds.
Use Tilt & Pressure Effects – Some drawing tools, like the art pencil and marker, use the Apple Pencil's tilt and pressure. Hold the stylus at an angle and vary the pressure as you sketch to achieve different effects like shading or calligraphy.
Quickly Erase a Layer – Double-tap the Eraser tool to clear the active layer. (The app will confirm that's what you want to do first.)
Small Screen Shortcuts – Long-press on the iPhone can be used as a shortcut in various parts of the interface:
- Press and hold a drawing tool icon to toggle between it and the eraser
- Show the options for the current layer by pressing on its icon
- Quickly pick a tint by holding down on the current color swatch
To quickly hide or show the toolbars in portrait mode, tap in the space to the left or right of home indicator (on iPhone X). You can also swipe down on the toolbar to hide it or swipe up to show it again.
Move / Transform
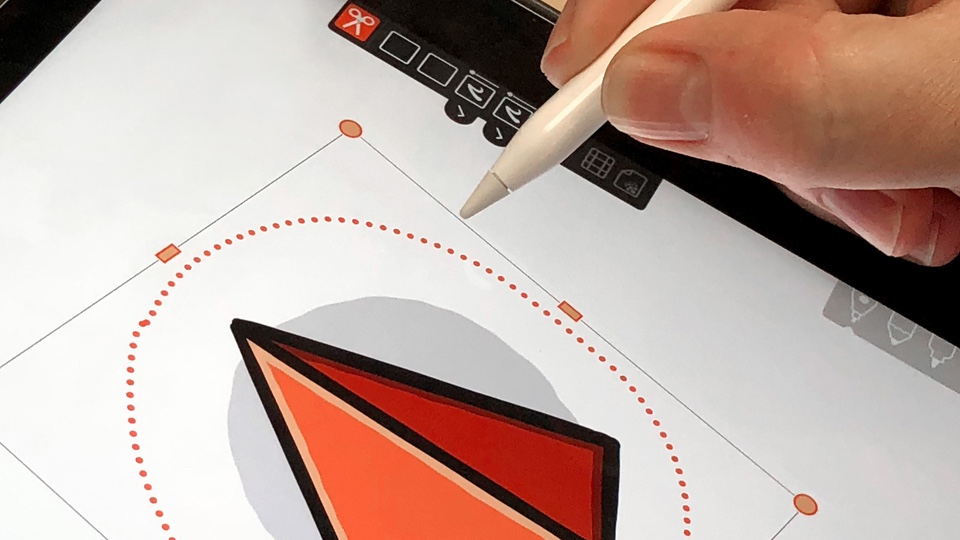
Rotate with Precision – Tap on the gray bounding box around a selection then drag to rotate in any direction. This technique provides finer control when precise angles are needed.
Cut & Paste Between Layers – The Selection tool can quickly move content from one layer to another. Lasso the portion of your sketch you want to move and select Cut from the menu at the top of the screen. Next, tap on a layer to open its menu and select Import / Paste… then Paste from Clipboard. Position the content and tap Place Image when you're done.
Layers
Quickly Turn Layers On or Off – Double-tap a layer's icon in the panel to hide or show it (without opening the options popup). This also works with the background texture or grid & template icons.
Lock Layers to Prevent Changes – Tap the lock icon on a layer's options to prevent accidental erasing or stray marks, as well as to omit its contents when lassoing or merging.
Reorder Your Layers – Long-press on a layer to start a drag. Drop it anywhere in the palette to change its display order (the bottom layer in the panel is furthest back.)
Adjust Layer Transparency – Use the Apple Pencil to drag the mini-slider on the layer icon: it's quicker than opening the options popup!
Transparency Masking – Toggle the Transparency Masking icon on a layer's options to quickly re-color or shade existing elements on the canvas. Transparent pixels are ignored in this masked mode so you can always draw “inside the lines”. Flood-fill shapes to quickly re-color them, use any tool to shade or adjust existing artwork, and much more.
Colors
Reorder Custom Colors – Long press on a color chip in the custom color set and you can "pick it up" and drag it to another position. This is a great way to organize your custom color sets by hue, saturation or brightness. Colors in preset palettes like Vivid Hues cannot be re-arranged.
Compact Color – Tap & hold the color chip and drag your finger to instantly select from a range of tints and shades. Tap the Color Sets icon to pick from flesh tones, muted hues, pastels, recently used colors, and more.
Define your own custom colors by tapping on an empty color chip. Then select the perfect color using Linea's color wheel, by entering a hex value, or from sampling with the eyedropper tool.
Add the Eyedropper to Your Arsenal – Selecting 'Recent Colors' as one of the three color sets adds an eyedropper tool to the bottom of the palette. You can then use the eyedropper as you sketch to quickly select any color on screen and add it to your list of recent colors. Super handy!
Clear Ink – Select the Clear Ink swatch from the top of the colors palette to “erase” areas of your sketch. It turns any tool into a textured eraser. Great for blending areas of one layer into another, knocking back part of a layer into the background, and more.
Sketches
Set Canvas Defaults – You can set Linea to use any combination of paper, background, fonts, and grid/template settings when creating a new sketch. Simply open a drawing that has the settings you want, tap the sketch Actions (⋯) and then use "Set Canvas as Default".
Handy Gestures See what we did there? – Tapping with two fingers will undo changes. Three fingers will redo them. Putting a finger down while drawing a ZipLine will enable or disable QuickToggle angle snapping behavior as well as Transform handle snapping, depending on your preferences in Settings.
Reset the Canvas – A long-press the compass icon or a quick two-finger pinch inward will reset the canvas so there's no rotation and content fills the screen.

Draw on a Big Screen – In a classroom or other presentation setting, you can display the canvas on a larger screen. First enable AirPlay in Control Center or attach your iPad to a TV using an adapter. Then tap a sketch's Action (⋯) icon and enable Presentation Mode. As you continue drawing, your audience sees the results without any tools or palettes. Pretty neat!
Send Any Image to Linea – Linea includes a sharing extension that lets you use "Send to Linea" in any other application. You'll need to enable the feature using the More item in the Sharing sheet. Then you can use the action icon (box with arrow pointing up) to send an image to a Linea project. Works great after taking a screenshot that you want to annotate with Linea!
Projects
Create a PDF of Your Creations – From the Project View, tap the Actions (⋯) menu, then tap "Export as PDF…" Linea will collect all of the project's sketches and create a multi-page PDF to print or share. There are also options to adjust the output prior to saving. You can also create a PDF by selecting individual sketches within a project folder.
Revert a Sketch – From the Project View, tap Select then choose a sketch and use Versions from the Actions (⋯) menu (long-press on the sketch is a handy shortcut.) Linea presents you with a list of edits and allows you to revert to a previous version or create a brand new copy. Note: This feature requires iCloud being enabled in settings.
Manage iCloud Downloads – You can quickly download all existing sketches from iCloud using the Actions (⋯) icon in the Project view. Tap Download All and all of your sketches will be copied to the iPad. If you need to free up space, you use Remove Local Copies from that same menu.
Quickly Open a Sketch – When looking at the multi-project view, each project shows the first three thumbnails. You can double-tap on the thumbnail to open the sketch directly, avoiding the project view.
Set a Collection Thumbnail – Add custom thumbnails to your collections to help find them quickly and easily.
And More…
Talk To the Finger – By default, Linea gives you a Touch Eraser when an Apple Pencil is in use. You can customize this in the Apple Pencil section in Settings. Besides erasing, your finger can be used to blend, draw using the selected tool, move the canvas, or do nothing at all.
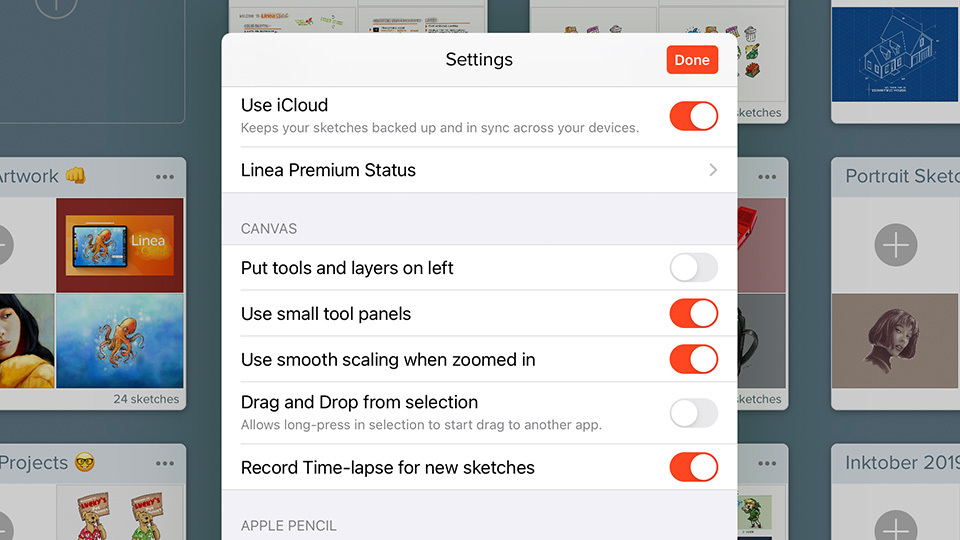
Customizing Tools & Palettes – Tap the gear icon in the Project view to open Settings. From there you can swap the positions of Linea's drawing tools, use smaller tool panels, configure smooth scaling while zooming, and add new dragging behaviors.
Video Tutorials – Be sure to visit our YouTube channel for more handy tips and tricks as well as to learn specific techniques and in-depth Linea Sketch tool dives.
Check the Knowledge Base – Our support site has more information including keyboard shortcuts, device support, performing backups, and more.
Linea is available on iPad, iPhone, and Mac. Learn more...